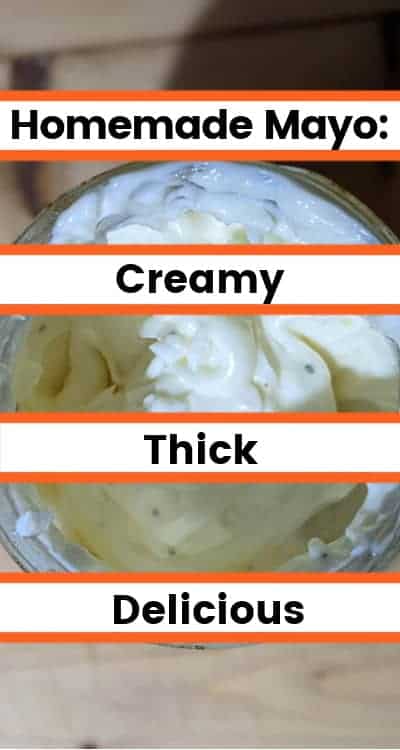
Homemade mayonnaise recipe: Almost as good as Publix
I didn’t eat mayonnaise growing up, and admittedly I was grossed out by it into my early adult life. Crafting the perfect homemade mayonnaise recipe was the last thing on my family’s list for home projects. But there was always one specific mayonnaise that I loved – Publix mayo. If you’re from Florida or have spent significant time there, you probably know what I’m talking about (all hale the PubSub).
Fast forward to 2021, I moved to a in Kentucky where they not only eat their fair share of mayo but make it themselves. Once I was taught to make mayonnaise, I knew my goal was to replicate Publix mayo as close as possible. So I created a recipe, tweaking the spices by 1/4 tsp and making all my friends taste it until I felt I had gotten as close to Publix mayo as I could.
And hereby births my newfound love for homemade mayonnaise.
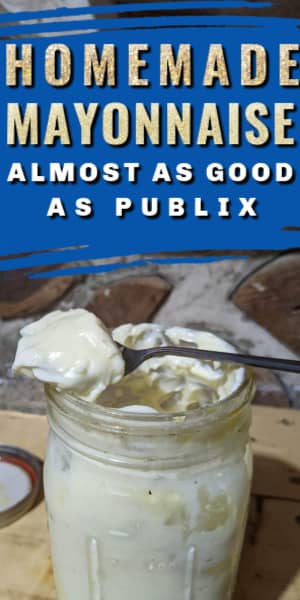
Table of contents
What is homemade mayonnaise made of?
I was amazed when I learned how to make homemade mayonnaise because it is simple and easy. All you need is eggs, a neutral oil, vinegar and any spices of your choice. Optional ingredients are lime or lemon juice for a little zest!
What about the other ingredients?
Free-range, ‘happy’ eggs are the best because they’re rich in nutrients and come from healthy hens. As for vinegar, my favorite is rice vinegar but I also love using apple cider vinegar (hello, health). My spices of choice for a traditional, Publix-esque mayo are salt, sugar, onion powder, garlic powder and pepper.
There are plenty of great tips and tricks out there, some of which I can agree with and others I either disagree with or just don’t have the experience to weigh in on. For example, I almost always use room temperature ingredients, but whenever I use cold eggs for my homemade mayo I do not notice a drastic difference in my DIY homemade mayonnaise-making experience. Additionally, I have found that making mayonnaise in super hot, humid or wet weather is a total pain in the butt and I recommend avoid it at all costs when possible.
What is the best oil to use for a homemade mayonnaise recipe?
Any neutral, refined oil is ideal when making mayo at home because they don’t have an overpowering, robust taste like olive oil does. I’ve found that canola, vegetable or a sunflower/coconut oil blend are the best. I’ve used corn oil once, which resulted in a thinner, less fluffy mayonnaise, though it still works in a pinch. I have not yet tested grapeseed or safflower oil, but if you do and love it then let me know!
How long does homemade mayo last?
Honesty hour: a quart of mayonnaise lasts maybe a week on the farm if we’re lucky…so sometimes I make 2 or three quarts at a time. Lemon/lime juice and vinegar act as a preservative, so if you keep your mayo refrigerated, a quart will last up to 4 weeks. I haven’t ever tried to can or preserve mayo for the shelf, but if I ever attempt it and figure it out, you bet I’ll letcha know how it goes.
What tools for I need to make mayonnaise at home?
You’ll need a few items that are required, and I’ll share my favorite item that isn’t required, but just nice to have. The products below are the products I use; they are also products that can be easily attained at a thrift/secondhand store. If you like to buy new, go for it! If you’re a fine of the thrift stores, more power to ya. I do a little bit of both, depending on my time crunch and what is available to me.
Wide mouth, quart sized mason jar with lid
Any quart sized mason jar, or even something similar to it, will work. You want a vessel that the immersion blender fits into with a little bit of wiggle room, but not too much. You don’t want a container that is too snug around the immersion blender because things will get messy. The product below is what I use (I often like to make two batches at a time when making mayonnaise!)
Immersion blender
You don’t need a fancy immersion blender to make mayonnaise. It is nice and convenient to purchase a multi-speed hand blender, especially when you’re starting out, but it’s really all about getting used to the feel of the equipment you have. Trial and error. This is the blender we use, and I love it. There are 2 speeds.
Liquid measuring cup
You can use a 1 cup or 2 cup measuring device, or larger if it’s what you have! I typically use a 2 cup, glass, Pyrex measuring cup with a handle on it. If you don’t have a measuring cup, and don’t want to buy one, that is also fine! Use a standard mug (if you want a handle) or a just a cup – or heck, just pour right out of the oil bottle!
Admittedly, I often just pour out of the bottle now. When I first started making homemade mayo, I preferred to use a measuring cup so I could track how much oil I was using, and how it changed depending on my circumstances (climate, type of oil, temperature of ingredients, etc.). The cup below is what I use when I use a measuring cup.
A mini spatula
NOT required, but it is the most handy tool! This mini silicone spatula makes it easy to swipe all the excess mayo off the immersion blender when removing it from a full jar. If your mayonnaise begins to break, you can use a long, mini spatula to slowly incorporate the almost-broken-mayo together to try and avoid breakage.
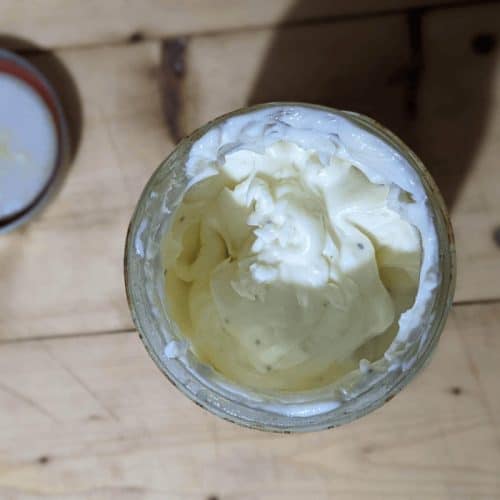
DIY Homemade Mayonnaise Recipe
Equipment
- 1 wide mouth quart sized mason jar Or similar vessle
- 1 immersion blender
- 1 small spatula
- 1 liquid measuring cup 1 or 2 cup measuring device is fine.
Ingredients
- 3 eggs
- 1 ¼ tsp salt
- 1 ¼ tsp sugar
- ½ tsp black pepper
- ½ tsp onion powder
- ½ tsp garlic powder
- 1 squirt lime juice
- 3 tbsp rice vinegar
- 2 cups vegetable oil (sometimes slightly more, sometimes less)
Instructions
- Add eggs, vinegar, lime juice and all spices to quart sized, wide mouthed mason jar.
- Use a hand immersion blender to lightly blend the eggs and spices together before starting to add oil.
There are a few methods for the next part: Adding oil and emulsifying
- Option 1: You can slowly, and steadily, add oil with one hand while using the immersion blender with the other hand, blending the steady stream of oil, eggs and spices together before it starts to thicken. This can be difficult to do alone, but not impossible. The mayo should start to thicken at about the halfway point – prime tasting time! Taste a bit of your mayo and then read the notes below if something seems off. If all is well, begin alternating adding oil and mixing until the mayo is almost at the top of the jar. You don't need to use the immersion motor every time you mix – manual mixing is a good idea towards the end to avoid breaking the mayonaise. The fuller is gets, the messier the job gets (and the easier it is to 'break' the mayo – see notes) so don't worry about filling the jar completely. I usually stop about an inch below the lip.
- Option 2: Add a fair amount of oil (maybe ¼ cup) and emulsify on a low setting starting from the surface of the mixture and then gently blending the mixture by slowly pushing down and pulling up the other side to mix the oil with the egg/spice/vinegar combination. Once fully mixed, add more oil and emulsify again. The mayo should start to thicken at about the halfway point – prime tasting time! Taste a bit of your mayo and then read the notes below if something seems off. If all is well, repeat these steps until the mayo is thick and almost to the top of the jar. You don't need to use the immersion motor every time you mix – manual mixing is a good idea towards the end to avoid breaking the mayonnaise. The fuller it gets, the messier the job gets (and the easier it is to 'break' the mayo – see notes) so don't worry about filling the jar completely. I usually stop about an inch below the lip.
- Option 3: Your third option is the more primitive, time-consuming option. The previous two options use more of the immersion blender motor, as this option uses a manual mixing method in addition to the motor. Add oil (about ¼ cup) and motor mix into your egg/spices/vinegar blend. Add another ¼ cup oil and motor mix again. After the first two mixes, at a little less than ¼ cup of oil and mix manually (don't use the motor). This is a great method when just starting out because it gives you an idea of the thickening process, when it happens and how the oil affects the process. Mix as much manually with this method, occasionally using the motor when it seems the manual mix isn't incoorporating the oil enough. The mayo should start to nicely thicken at about the halfway point – prime tasting time! Taste a bit of your mayo and then read the notes below if something seems off. If all is well, repeat these steps until the mayo is thick and almost to the top of the jar. The fuller it gets, the messier the job gets (and the easier it is to 'break' the mayo – see notes) so don't worry about filling the jar completely. I usually stop about an inch below the lip.
- Once you have a lovely tasting mayo, slowly remove your immersion blender and use your spatula to get the excess mayo off the blender and into the jar (waste not!)
- Enjoy immediately or place in the fridge to cool and enjoy later.
Notes
Different options for fixing ‘broken’, ‘curdled’, or ‘split’ mayonnaise
- If too much oil is added too quickly, it can be difficult to emulsify with the egg yolks and you risk breaking your mayonnaise. Slow and steady.
- If it looks like things are separating, I manually mix the mayo without using the motor of the immersion blender. Sometimes I’ll even remove the blender and mix it with a knife.
- If you’ve gotten overzealous with oil, place some of your broken mayo in a clean, separate bowl. Add a few drops of lemon juice or vinegar to the broken mayonnaise and mix. As the mixture starts congealing, slowly add the rest of your mayonnaise until it looks, feels and tastes how you’d like.
- If you broke your mayo, add an egg yolk to a large bowl and use a whisk to beat the broken mayo mixture, bit by bit, into the yolk with a whisk.
- Mustard powder also encourages emulsification and can be used to prevent broken mayo. Start small, with maybe 1 tsp. Don’t worry, your mayo won’t taste like mustard!
- If your mayo is too sweet or salty, add a splash of vinegar or lime juice.
- If your mayo is far too sour or acidic, add a small amount of sugar.
- If it is incredibly hot and humid, you might have a hard time getting your mayonnaise to thicken to stiff peaks – it should thicken the rest of the way in the fridge, though.
- You do not HAVE to use rice vinegar. Apple cider vinegar is also a great option! I use 3 caps of rice vinegar or 4 caps of apple cider vinegar.
- Egg yolks are your thickener – if by the middle of the jar your mayo is overly thin and runny, try adding one egg yolk, or a tsp of mustard powder.
- I use canola or vegetable oil. Olive oil is not the best option as it has a very robust taste and can alter the final product. Feel free to mix oils, using some olive oil and some vegetable oil. In my experience, vegetable oil works best. A Sunflower/Coconut Oil blend also works well and has a neutral taste for those wanting to avoid vegetable oils.
- Mayonnaise requires raw eggs. If this worries you, try to source your eggs from a trusted, local farm that raises its chickens in a clean, humane way. I’ve been eating homemade mayonnaise for years with no sickness occurring or problems arising.
- Feel free to play around with different tastes! Add smoke paprika or hot sauce. YUM.